4-Axis Delta robot Setup
| Language: | English • 中文(简体) |
|---|

Contents
- 1 Introduction
- 2 Run softMC SIM
- 3 Run ControlStudio
- 4 Creating and Running a CONFIG.PRG file
- 5 Run Configurator Open new project
- 6 Create new Folder
- 7 Configuring Drive and Axes
- 8 Create Delta Robot
- 9 Build & Configure
- 10 Close Configurator
- 11 Create solution
- 12 Add watches
- 13 Run the Robot
- 14 Run Robot with roboDK
- 15 Robot Programs Example
Introduction
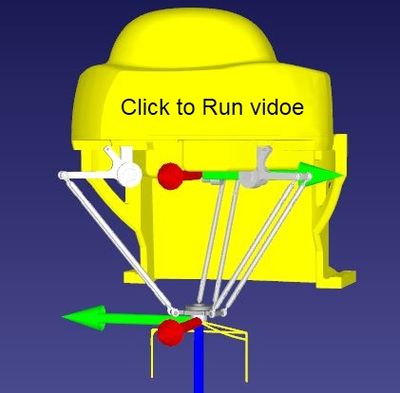
In this example we will use softMC simulator to create Delta Robot, run it from terminal watch some parameters and finally run it with roboDK
We select Delta robot from roboDK library, robot parameters:
Rbig = 110 [mm]
L1 = 100 [mm]
L2 = 270 [mm]
Rsmall = 40 [mm]
Gear 1:10
Typical velocity is 18,000/10 [deg/sec] 3000 [RPM]
Typical max velocity is 30,000/10 [deg/sec]
Typical Acceleration/Deceleration 720,000/10 [deg/sec]
Typical Max Acceleration/Deceleration 900,000/10 [deg/sec]
Typical Jerk is 2,160,000/10 [deg/sec]
Typical Jerk is 2,700,000/10 [deg/sec]
Note:
Tool value is: tool = #{0,0,15,0}
Run softMC SIM
I run my softMC simulator with my VM, i login using mc for System login and Password than i type ifconfig to find my softMC simulator IP address, in the following example IP is 192.168.56.103


Run ControlStudio
Run ControlStudio and make sure you run the approporiate firmware version in following example we run Firmware 0.4.17.2-C2


Creating and Running a CONFIG.PRG file
The Configurator does not generate a CONFIG.PRG file, which is a necessary file.
The most simple CONFIG.PRG file will look like this:
Sys.NumberAxes = 4
program
    Sys.Name = "DVG_Delta"
    Print "system is running  -  " ; Sys.Name
    Sys.DoubleFormat = 1           ; viewing the watch number
end program
NOTE: It is important that Sys.NumberAxes will be at least 4 as the Delta robot needs 4 axes.
Before opening the Configurator, make sure to run the CONFIG.PRG file by uploading it to the softMC using "Save and Load" and sending ">reset all" in the terminal.
Run Configurator Open new project
Run configurator from ControlStudio and open new Project


Important Notes:
- You do not see any drive under Buses folder since you run in simulation
- Make sure you see 4 axis (A1 A2 A3 A4)

Create new Folder
Now we will create our folder and our configuration file, to do it we will use "Save As" create "New" folder and name our configurator file as Delta


Configuring Drive and Axes
Define Drives
Since we work with softMC simulation we do not have any drives and can skip to the next one
Define Axes
Press on the first axis and its configuration window will show:
- Choose the "Axis Type". Please choose: "Rotary Gear" for the Delta robot.
- Set the Gear Ratio value to the correct value. we will keep value 1
Repeat the last steps for each used axis.

Hint:
If you have similar axis you can do all the setting than copy entire axis with right mouse clicking on the axis
The configuration window of the axes has few tabs.The "Properties" tab allows to set the axis properties. Set following properties appropriately to each axis
Important: this value are the final value after the gear
for a simulated robot, change the "Simulated Axis" property to "True"
velocity is 18,000 [deg/sec] 3000 [RPM]
max velocity is 30,000 [deg/sec]
Acceleration/Deceleration 720,000 [deg/sec]
Max Acceleration/Deceleration 900,000 [deg/sec]
Jerk is 2,160,000 [deg/sec]
max Jerk is 2,700,000 [deg/sec]
Position error max 10

Create Delta Robot
Right clik on Group icon and select Add Group

Select Robot
Group name DELTA
Select delta xyzr [rrrr]
Click on all four axis, note the frame color change from red to green

General
This tab allows to switch the axes which are linked to the group and to change the axes properties in cause you have more than 4 axis

Coupling
- Coupling matrix shouldn't be changed for a delta robot (define if Motor axis rotate only specific joint or more than one joint)
- Each joints position limits per axis.

Properties
This tab allows to set the robot properties, such as: position limits, speed limits, acceleration limits, etc.
Note:
- Make sure to set Position error max to 10 in simple/Cartesian table "PeMax" (-->delta.pemax=10)

Configuration
This tab has 3 sub-tabs:
- Make sure to set Tool Z axis to 15 to accomodate w RoboDK (-->delta.tool=#{0,0,15,0} )
For more information use the link
base
tool
machinetable
workpiece

Delta parameters
Here we set the Delta robot mechnical parameters:
Rbig = 110 [mm]
L1 = 100 [mm]
L2 = 270 [mm]
Rsmall = 40 [mm]

Build & Configure
Now we are ready to generate setup and communication files and run them on the softMC, click on "Build & Configure"
 |
---> | 
|
| Before Build & Configure | After Build & Configure |
|---|---|
 |

|

| |

|
Close Configurator
Now exit the configurator we can go back to configurator later on

Create solution
To create solution we have to do the following:
- Open Project (apj file) created by Build & Configure
- Save it as Solution (asn file)
- Add Config.prg from the Controller to PC
- Copy any user previews programs to the folders using explorer
- Add File(s) to the Solution tree
Open Project (apj file)


Save it as Solution


Add Config.prg from the Controller to PC

Add File(s) to the Solution tree


Add watches
Lets look what we have from Terminal
-->?grouplist
DELTA:A1,A2,A3,A4
and Add Delta watch for Enable Position feedback and XYZR value

Run the Robot
Run Robot now
Now we can run the robot
-->Delta.en=1
-->move delta {0,0,0,20}
Run Robot after re cycle
Do the following:
- Run and start the softMCSIM
- Run ControlStudio and connect to your softMCSIM
- Open your Solution "Delta"
- Double click on Program file "StartPRG.PRG"
- Click on the Icon "Save and Load"
Robot Delta is ready
Run Robot with roboDK
Open TCP/IP server to work with RoboDK
Save Load and run SERV4DEL.PRG, Than make sure you see "socket 2 is set" in ControlStudio Message log
Tip: use windows key + left error to get ControlStudio on the half left windows
' Version:     1.00
' Author:      Ron Danon DVG
' Description:
' History:     2017-06-17  base on server.prg  V1.00
'              Created
'------------------------------------------------------------------------------
dim shared numOfRobots as long = 1

program continue

  dim index as long
  dim sockNum as long = 2
  dim cPort as long = 7132
  dim jointStr as string
  dim robotGroups[1] as generic group 'same as size of numOfRobots
    dim robotNames[1] as string 'same as size of numOfRobots

'---------------Define robot groups and names---------------'
robotGroups[1] = DELTA
robotNames[1] = "robot1"
'robotGroups[2] = PUMA2
'robotNames[2] = robot2

'---------------Opening new socket---------------'
  call openNewSocket(sockNum,cPort)

'---------------Connecting to client---------------'
  call connectClient(sockNum,cPort,0)

'---------------Main Loop---------------'
  while True
    call createJsonStr(robotNames,robotGroups,jointStr)
    call checkIfReady(sockNum,cPort)
'    ?jointStr
'    ?SIZE(jointStr)
    print #sockNum,jointStr
  end while

'---------------Close sockets and exit---------------'
  print #sockNum,"finish"
  sleep 1000
  close #sockNum
  Print "Server Closed Sockets. Server Exits"

end program ' server.prg


'---------------------------------------'
'---------------Functions---------------'
'---------------------------------------'

sub openNewSocket(sockNum as long,cPort as Long)
  dim opened as long = 0
  while not opened
    Try
      OpenSocket Options=1 as #sockNum
      opened = 1
    catch 5043 'socket is already open
      print "socket", sockNum, "is already open. trying next socket"
      sockNum = sockNum + 1
    end Try
  end while
  print "socket", sockNum, "is set"
end sub


sub connectClient(sockNum as long, cPort as Long, ByVal sockIsOpen as long)
  dim str1 as string
  if sockIsOpen then
    close #sockNum
    OpenSocket Options=1 as #sockNum
  end if
  Accept(#sockNum, cPort)
  sleep 500
  str1=input$(loc(sockNum),#sockNum) 'receive data to check if connected
  ?"client is connected"
  sleep 200
end sub


sub checkIfReady(sockNum as long,cPort as Long)
  'Waits for a 'ready' input from roboDK before sending the next JSON string
  dim ready as long = 0
  while not ready
    Try
      while loc(sockNum) = 0   'while no data is available
        sleep 10
      end while
    catch 5041 'client disconnected
      print "client disconnected, waiting for connection"
      call connectClient(sockNum,cPort,1)
    end Try
    ready = (input$(loc(sockNum),#sockNum) = "ready") 'check if the input is "ready"
  end while
end sub


sub createJsonStr(robotNames[*] as string, robotGroups[*] as generic group, jointStr as string)
'FORMAT --> '{"robotName": [double-a1, double-a2, double-a3, double-a4, double-a5, double-a6]}' <---
'double is in precision of 2 digits after the point, i.e.: '0.12', '179.12'
  dim index1 as long
  dim index2 as long
  dim jointValues as generic joint
  dim temp as long = 50

  jointStr = "{"
  for index1 = 1 to numOfRobots
    jointValues = robotGroups[index1].PFb
    jointStr = jointStr + chr$(34) + robotNames[index1] + chr$(34) + ": ["
    for index2 = 1 to robotGroups[index1].ElementSize
      if index2 = 4 then
        temp = 0
      else
        temp = 50
      end if
      jointStr = jointStr + STRD$(-jointValues{index2} + temp, "%.2f") + ", "
    next
    jointStr = LEFT$(jointStr,LEN(jointStr)-2) + "], "
  next
  jointStr = LEFT$(jointStr,LEN(jointStr)-2) + "}"
end sub

'---------------End of functions---------------'
Run RoboDK
Copy paste to your folder "Fanuc_Delta.rdk" prepared by Servotronix include
- Delta robot from RoboDK library
- Prog1 a pyton script which open TCP/IP socekt to work with softMCSIM / serv4del.prg
Double click on the Prog1 icon to open RoboDK TCP/IP port and make sure you see in ControlStudio Message "client is connected"
| TCP/IP port Close |
TCP/IP port Open |
|---|---|
Prog1
import mcEnv

host, port = "192.168.56.103", 7132
finsihedTransmit = False

MCE = mcEnv.MCenv()
MCE.setSimulationSpeed(1000)
MCE.connectClient(host,port)
MCE.setRobot("robot1", "Fanuc M-1iA/0.5S")

robotList = ["robot1"]

while not finsihedTransmit:
    MCE.writeStr("ready")
    jsonStr = MCE.readJsonStr()
    MCE.moveRobots(robotList, jsonStr)

raise Exception('Finished')
Robot Programs Example
Here is a simple Pick and place program
Where P12 and P11 are the upper position and P2 and P1 are the lower position
|
'------------------------------------------------------------------------------
' File:        PnPTDelta.prg
' Purpose:     Robot Pick & Place
' Version:     1.00
' Author:      DVG
' History:     15.Jun.2017    -    created
'------------------------------------------------------------------------------

' module global "constants"


' module global variables
dim shared ZeroPosition as joint of xyzr = {0 , 0 , 0 , 0 }                'Moving as joint - for initial positioning
dim shared P1Position as joint of xyzr = {0, 0, 0, 0}                      '{J1,J2,J3,J4}

dim shared P1    as location of xyzr = #{0 , 75 , 300 , 0 }     '{X,Y,Z,R}
dim shared P11   as location of xyzr = #{0 , 75,  225 , 0}
dim shared P22   as location of xyzr = #{0 , -75,  225 , 0}
dim shared P2    as location of xyzr = #{0 , -75,  300 , 0}

dim shared RobotVelocity as double = 40.0
dim shared RobotTranVelocity as double = 40.0

program

    with Delta                                'set default group element, no need to explicitly indicate the motion element
        Attach                               'Attach the task to motion element (with Delta)
            En = TRUE
            Sleep 100
            Vcruise = RobotVelocity          'Set robot's cruise velocity
            Vtran = RobotTranVelocity
            while NOT En
                Sleep 100
            end while
            Move ZeroPosition                'moving to zero position
            WaitForMotion Delta
              call pickPlaceXYZ              'execute Pick and Place function
            Move ZeroPosition
            WaitForMotion Delta
        Detach
    end with

end program


sub pickPlaceXYZ

    dim i as long

    Move Delta P1Position
    WaitForMotion Delta
    Delta.BlendingMethod = 2                  'Type of motion blending - 2 is SuperPosition blending - in order to optimize movement, so that it will be as fast as possible
    Delta.BlendingFactor = 80                 'Percentage of the movement’s length that will not be blended with the next movement
    Delta.Cp = 10                             'At continous path blednign, sets the blend radious value - bigger equal smoother
    for i = 1 to 10
        Moves Delta P11
        WaitForMotion Delta
        Moves Delta P1
        WaitForMotion Delta
        Moves Delta P11
        WaitForMotion Delta
        Moves Delta P22
        WaitForMotion Delta
        Moves Delta P2
        WaitForMotion Delta
        Moves Delta P22
        WaitForMotion Delta
    next i
    Move Delta ZeroPosition
    WaitForMotion Delta

end sub