Difference between revisions of "4-Axis Delta robot Setup/zh-hans"
(Created page with "{{Languages}} = Introduction = link=http://softmc.servotronix.com/img_auth.php/9/94/Deltasim.html|400px <br/> <br/> In this example we will use soft...") |
|||
| Line 1: | Line 1: | ||
{{Languages}} | {{Languages}} | ||
| − | = | + | = 简介 = |
[[File:PrevDeltasim.JPG|link=http://softmc.servotronix.com/img_auth.php/9/94/Deltasim.html|400px]] <br/> <br/> | [[File:PrevDeltasim.JPG|link=http://softmc.servotronix.com/img_auth.php/9/94/Deltasim.html|400px]] <br/> <br/> | ||
| − | + | 在这个例子中,我们将使用softMC模拟器来创建Delta机器人,从终端观看一些参数,最后用roboDK运行机器人。<br/> | |
| − | + | 我们从roboDK库中选择Delta机器人,机器人参数:<br/> | |
Rbig = 110 [mm]<br/> | Rbig = 110 [mm]<br/> | ||
L1 = 100 [mm]<br/> | L1 = 100 [mm]<br/> | ||
| Line 10: | Line 10: | ||
Rsmall = 40 [mm] <br/> | Rsmall = 40 [mm] <br/> | ||
Gear 1:10 <br/> | Gear 1:10 <br/> | ||
| − | + | 典型速度是 18,000/10 [deg/sec] 3000 [RPM] <br/> | |
| − | + | 典型最大速度 30,000/10 [deg/sec] <br/> | |
| − | + | 典型加速度/减速度 720,000/10 [deg/sec] <br/> | |
| − | + | 典型最大加速度/减速度 900,000/10 [deg/sec] <br/> | |
| − | + | 典型加加速度 2,160,000/10 [deg/sec] <br/> | |
| − | + | 典型最大加加速度 2,700,000/10 [deg/sec] <br/> | |
| − | + | 注意: <br/> | |
| − | + | 工具坐标值为: tool = #{0,0,15,0} <br/> | |
| − | = | + | = 运行softMC SIM = |
| − | + | 使用VM运行softMC模拟器,'''mc'''作为登录系统登录和密码,输入'''ifconfig'''找到softMC模拟器IP地址,在下面的例子中是'''192.168.56.103''' <br/> <br/> | |
[[File:DeltaEx01.JPG]] <br/> <br/> | [[File:DeltaEx01.JPG]] <br/> <br/> | ||
[[File:DeltaEx02.JPG]] <br/> <br/> | [[File:DeltaEx02.JPG]] <br/> <br/> | ||
| − | = | + | = 运行ControlStudio = |
| − | + | 运行ControlStudio,并确保运行相应的固件版本,在下面的例子中,我们运行固件0.4.17.2-C2 <br/> <br/> | |
[[File:Delta2.jpg]] <br/> <br/> | [[File:Delta2.jpg]] <br/> <br/> | ||
[[File:Delta3.jpg]] <br/> <br/> | [[File:Delta3.jpg]] <br/> <br/> | ||
| − | = | + | = 创建并运行CONFIG.PRG文件 = |
| − | + | 配置器不生成CONFIG.PRG文件,这是必需的文件。<br /> | |
| − | + | 最简单的CONFIG.PRG文件将如下所示: | |
<syntaxhighlight lang="vb"> | <syntaxhighlight lang="vb"> | ||
Sys.NumberAxes = 4 | Sys.NumberAxes = 4 | ||
| Line 41: | Line 41: | ||
end program | end program | ||
</syntaxhighlight> | </syntaxhighlight> | ||
| − | + | 注意:由于Delta机器人需要4个轴,所以Sys.NumberAxes至少为4。 <br /> | |
| − | + | 在打开配置器之前,请确保通过使用'''"Save and Load"'''将其上传到softMC并在终端中发送'''">reset all"'''来运行CONFIG.PRG文件。 | |
| − | = | + | = 运行配置器打开新项目 = |
| − | + | 从ControlStudio运行配置程序并打开新的Project <br/> <br/> | |
[[File:Delta5.jpg]] <br/> <br/> | [[File:Delta5.jpg]] <br/> <br/> | ||
[[File:Delta6.jpg]] <br/> <br/> | [[File:Delta6.jpg]] <br/> <br/> | ||
| − | ''' | + | '''重要注意事项:''' <br/> |
| − | * | + | * 您在模拟中运行时,您在Buses文件夹下看不到任何驱动器 |
| − | * | + | * 确保能看到4个轴(A1 A2 A3 A4) |
[[File:Delta11.jpg]] <br/> <br/> | [[File:Delta11.jpg]] <br/> <br/> | ||
| − | = | + | = 创建新文件夹 = |
| − | + | 现在我们将创建我们的文件夹和我们的配置文件,我们将使用"Save As"创建"New"文件夹,并将我们的配置文件命名为Delta。 <br/><br/> | |
[[File:Delta7.jpg]] <br/> <br/> | [[File:Delta7.jpg]] <br/> <br/> | ||
[[File:Delta8.jpg]] <br/> <br/> | [[File:Delta8.jpg]] <br/> <br/> | ||
| Line 60: | Line 60: | ||
[[File:Delta10.jpg]] <br/> <br/> | [[File:Delta10.jpg]] <br/> <br/> | ||
| − | = | + | = 配置驱动器和轴 = |
| − | == | + | == 定义驱动器 == |
| − | + | 由于我们使用softMC模拟器,我们没有任何驱动器,可以跳到下一步 | |
| − | == | + | == 定义轴 == |
| − | + | 点击第一个轴,其配置窗口将显示: <br /> | |
| − | # | + | # 选择"Axis Type"。Delta选择"Rotary Gear"。 <br /> |
| − | # | + | # 设置正确的减速比。 我们该值保持为1<br /> |
| − | + | 对每个使用的轴重复最后一步。 <br /> | |
[[File:Delta12.jpg]]<br /> | [[File:Delta12.jpg]]<br /> | ||
<br /> | <br /> | ||
| − | ''' | + | '''提示:''' <br/> |
| − | + | 如果您有类似的轴,您可以是用鼠标单击轴复制整个轴执行所有设置。 <br/><br/> | |
| − | + | 轴的配置窗口有一些选项卡。 '''"Properties"'''选项卡允许设置轴属性。 为每个轴适当设置以下属性 <br /> <br /> | |
| − | ''' | + | '''重要:''' 这些值是减速后的最终值 <br /> <br /> |
| − | + | 对于模拟机器人,将"Simulated Axis"属性更改为"True"<br /> | |
velocity is 18,000 [deg/sec] 3000 [RPM] <br/> | velocity is 18,000 [deg/sec] 3000 [RPM] <br/> | ||
max velocity is 30,000 [deg/sec] <br/> | max velocity is 30,000 [deg/sec] <br/> | ||
| Line 84: | Line 84: | ||
[[File:Delta14.jpg]]<br /> | [[File:Delta14.jpg]]<br /> | ||
| − | = | + | = 创建Delta机器人 = |
| − | + | 右键单击组图标,然后选择添加组 <br /> <br /> | |
[[File:Delta15.jpg]]<br /> <br /> | [[File:Delta15.jpg]]<br /> <br /> | ||
| − | + | 选择 '''Robot''' <br /> | |
| − | + | 组名称 '''DELTA'''<br /> | |
| − | + | 选择 '''delta xyzr [rrrr]''' <br /> | |
| − | + | 单击所有四轴,注意框架颜色从红色变为绿色。<br /> <br /> | |
[[File:Delta17.jpg]]<br /> | [[File:Delta17.jpg]]<br /> | ||
| − | == | + | == 综合 == |
| − | + | 此选项卡允许切换链接到组的轴,并更改轴属性,因为您有多于4轴。 | |
| + | <br /> <br /> | ||
[[File:Delta18.jpg]]<br /> | [[File:Delta18.jpg]]<br /> | ||
| − | == | + | == 耦合 == |
| − | # | + | # 对于Delta机器人,不应定义耦合矩阵(定义电机轴是否仅旋转特定关节或多于一个关节。) |
| − | # | + | # 每个轴的关节位置限制。 <br /> <br /> |
[[File:Delta19.jpg]]<br /> | [[File:Delta19.jpg]]<br /> | ||
| − | == | + | == 属性 == |
| − | + | 此选项卡允许设置机器人属性,如:位置限制,速度限制,加速限制等<br /><br/> | |
| − | + | 注意: | |
| − | * | + | * 确保在simple/Cartesian表“PeMax”(-->delta.pemax=10)中将位置误差设置为最大值10 (-->delta.pemax=10) |
[[File:Delta20.jpg]]<br /> | [[File:Delta20.jpg]]<br /> | ||
| − | == | + | == 配置 == |
| − | + | 该选项表有3个子选项表: <br /> <br/> | |
| − | * | + | *确保将工具Z轴设置为15以适应RoboDK(-->delta.tool=#{0,0,15,0})<br /><br/> |
| − | + | 有关更多信息,请使用以下链接 <br/> | |
[[Robot_Working_Frames#BASE|base]] <br/> | [[Robot_Working_Frames#BASE|base]] <br/> | ||
[[Robot_Working_Frames#tool|tool]] <br/> | [[Robot_Working_Frames#tool|tool]] <br/> | ||
| Line 120: | Line 121: | ||
[[File:Deltatool.JPG]]<br /> | [[File:Deltatool.JPG]]<br /> | ||
| − | === | + | === Delta参数 === |
| − | + | 这里我们设置Delta机器人的机械参数:<br/> | |
Rbig = 110 [mm]<br/> | Rbig = 110 [mm]<br/> | ||
L1 = 100 [mm]<br/> | L1 = 100 [mm]<br/> | ||
| Line 128: | Line 129: | ||
[[File:Delta22.jpg]]<br /> | [[File:Delta22.jpg]]<br /> | ||
| − | = | + | = 建立&配置 = |
| − | + | 现在我们已经准备好生成安装和通信文件,并在softMC上运行它们,点击'''"Build | |
| + | &Configure"'''<br/> <br/> | ||
{| class="wikitable" | {| class="wikitable" | ||
|- | |- | ||
| Line 137: | Line 139: | ||
{| class="wikitable" | {| class="wikitable" | ||
|- | |- | ||
| − | ! scope="col"| | + | ! scope="col"|Build & Configure 前 || ! scope="col"| Build & Configure 后 |
|- | |- | ||
|[[File:Delta24.jpg]] ||[[File:Delta26.jpg]] | |[[File:Delta24.jpg]] ||[[File:Delta26.jpg]] | ||
| Line 146: | Line 148: | ||
|} | |} | ||
| − | = | + | = 关闭配置器 = |
| − | + | 现在退出配置程序,我们可以稍后再回到配置器。 <br/><br/> | |
[[File:Delta29.jpg]]<br /> | [[File:Delta29.jpg]]<br /> | ||
| − | = | + | = 创建解决方案 = |
| − | + | 要创建解决方案,我们必须执行以下操作: <br/> | |
| − | * | + | * 打开由Build&Configure创建的Project(apj文件) |
| − | * | + | * 将其另存为解决方案(asn文件) |
| − | * | + | * 将Config.prg从控制器添加到PC |
| − | * | + | * 使用资源管理器将任何用户预览程序复制到文件夹 |
| − | * | + | * 将文件添加到解决方案树 <br/> <br/> |
| − | ''' | + | '''打开工程''' (apj file) <br/> <br/> |
[[File:Delta30.jpg]]<br /> <br/> | [[File:Delta30.jpg]]<br /> <br/> | ||
[[File:Delta32.jpg]]<br /> <br/> | [[File:Delta32.jpg]]<br /> <br/> | ||
| − | ''' | + | '''另存为解决方案''' <br/> <br/> |
[[File:Delta33.jpg]]<br /> <br/> | [[File:Delta33.jpg]]<br /> <br/> | ||
[[File:Delta34.jpg]]<br /> <br/> | [[File:Delta34.jpg]]<br /> <br/> | ||
| − | ''' | + | '''将Config.prg从控制器添加到PC''' <br/> <br/> |
[[File:Delta35.jpg]]<br /> <br/> | [[File:Delta35.jpg]]<br /> <br/> | ||
| − | ''' | + | '''将文件添加到解决方案树''' <br/> <br/> |
[[File:Delta36.jpg]]<br /> <br/> | [[File:Delta36.jpg]]<br /> <br/> | ||
[[File:Delta37.jpg]]<br /> <br/> | [[File:Delta37.jpg]]<br /> <br/> | ||
| − | = | + | = 添加监视 = |
| − | + | 我们可以从终端查看拥有的轴 <br/> | |
-->?grouplist <br/> | -->?grouplist <br/> | ||
DELTA:A1,A2,A3,A4 <br/> | DELTA:A1,A2,A3,A4 <br/> | ||
| − | + | 添加启用Delta机器人位置反馈和XYZR值的监视。 <br/><br/> | |
[[File:Delta38.jpg]]<br /> | [[File:Delta38.jpg]]<br /> | ||
| − | = | + | = 运行机器人 = |
| − | == | + | == 现在运行机器人 == |
| − | + | 现在我们可以运行机器人 <br/> | |
-->Delta.en=1 <br/> | -->Delta.en=1 <br/> | ||
-->move delta {0,0,0,20} <br/> | -->move delta {0,0,0,20} <br/> | ||
| − | == | + | == 重新循环运行机器人 == |
| − | + | 执行以下操作: | |
| − | * | + | * 运行并启动softMCSIM |
| − | * | + | * 运行ControlStudio并连接到您的softMCSIM |
| − | * | + | * 打开您的"Delta" 解决方案 |
| − | * | + | * 双击程序文件"StartPRG.PRG" |
| − | * | + | * 点击图标"Save and Load" |
| − | ''' | + | '''Delta 机器人就绪''' |
| − | |||
| − | |||
| − | |||
| − | |||
| − | |||
| + | = 用roboDK运行机器人 = | ||
| + | == 打开TCP / IP服务器以使用RoboDK == | ||
| + | 保存加载并运行SERV4DEL.PRG,确保您在ControlStudio消息日志中看到"socket 2 is set"<br/> | ||
| + | 提示:使用Windows键+左边的错误,在左半边的窗口上得到ControlStudio。 | ||
<syntaxhighlight lang="vb"> | <syntaxhighlight lang="vb"> | ||
' Version: 1.00 | ' Version: 1.00 | ||
| Line 331: | Line 332: | ||
</syntaxhighlight> | </syntaxhighlight> | ||
| − | == | + | == 运行RoboDK == |
| − | + | 复制粘贴到由Servotronix编写的文件夹“Fanuc_Delta.rdk”包括 | |
| − | * | + | * 来自RoboDK库的Delta机器人 |
| − | * | + | * Prog1一个pyton脚本,打开TCP / IP套接字以使用softMCSIM / serv4del.prg |
| − | + | 双击Prog1图标打开RoboDK TCP / IP端口,并确保您在ControlStudio消息中看到"client | |
| + | is connected" | ||
{| class="wikitable" | {| class="wikitable" | ||
| Line 368: | Line 370: | ||
</syntaxhighlight> | </syntaxhighlight> | ||
| − | = | + | = 机器人程序示例 = |
| − | + | 这是一个简单的拾取和放置程序,其中P12和P11是较高的位置,P2和P1是较低的位置。 <br/> <br/> | |
| − | |||
|[[File:DeltaCapture01.JPG|1200px]] <br/> | |[[File:DeltaCapture01.JPG|1200px]] <br/> | ||
Revision as of 07:41, 24 July 2017
| 语言: | [[::4-Axis Delta robot Setup|English]] • [[::4-Axis Delta robot Setup/zh-hans|中文(简体)]] |
|---|
Contents
简介
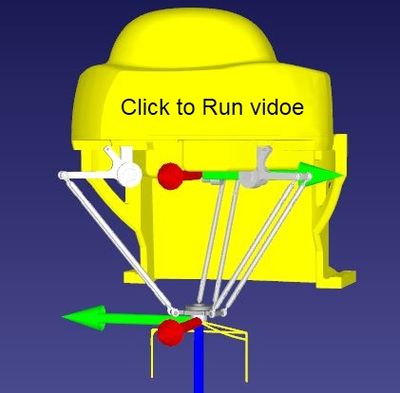
在这个例子中,我们将使用softMC模拟器来创建Delta机器人,从终端观看一些参数,最后用roboDK运行机器人。
我们从roboDK库中选择Delta机器人,机器人参数:
Rbig = 110 [mm]
L1 = 100 [mm]
L2 = 270 [mm]
Rsmall = 40 [mm]
Gear 1:10
典型速度是 18,000/10 [deg/sec] 3000 [RPM]
典型最大速度 30,000/10 [deg/sec]
典型加速度/减速度 720,000/10 [deg/sec]
典型最大加速度/减速度 900,000/10 [deg/sec]
典型加加速度 2,160,000/10 [deg/sec]
典型最大加加速度 2,700,000/10 [deg/sec]
注意:
工具坐标值为: tool = #{0,0,15,0}
运行softMC SIM
使用VM运行softMC模拟器,mc作为登录系统登录和密码,输入ifconfig找到softMC模拟器IP地址,在下面的例子中是192.168.56.103


运行ControlStudio
运行ControlStudio,并确保运行相应的固件版本,在下面的例子中,我们运行固件0.4.17.2-C2


创建并运行CONFIG.PRG文件
配置器不生成CONFIG.PRG文件,这是必需的文件。
最简单的CONFIG.PRG文件将如下所示:
Sys.NumberAxes = 4
program
    Sys.Name = "DVG_Delta"
    Print "system is running  -  " ; Sys.Name
    Sys.DoubleFormat = 1           ; viewing the watch number
end program
注意:由于Delta机器人需要4个轴,所以Sys.NumberAxes至少为4。
在打开配置器之前,请确保通过使用"Save and Load"将其上传到softMC并在终端中发送">reset all"来运行CONFIG.PRG文件。
运行配置器打开新项目
从ControlStudio运行配置程序并打开新的Project


重要注意事项:
- 您在模拟中运行时,您在Buses文件夹下看不到任何驱动器
- 确保能看到4个轴(A1 A2 A3 A4)

创建新文件夹
现在我们将创建我们的文件夹和我们的配置文件,我们将使用"Save As"创建"New"文件夹,并将我们的配置文件命名为Delta。


配置驱动器和轴
定义驱动器
由于我们使用softMC模拟器,我们没有任何驱动器,可以跳到下一步
定义轴
点击第一个轴,其配置窗口将显示:
- 选择"Axis Type"。Delta选择"Rotary Gear"。
- 设置正确的减速比。 我们该值保持为1
对每个使用的轴重复最后一步。

提示:
如果您有类似的轴,您可以是用鼠标单击轴复制整个轴执行所有设置。
轴的配置窗口有一些选项卡。 "Properties"选项卡允许设置轴属性。 为每个轴适当设置以下属性
重要: 这些值是减速后的最终值
对于模拟机器人,将"Simulated Axis"属性更改为"True"
velocity is 18,000 [deg/sec] 3000 [RPM]
max velocity is 30,000 [deg/sec]
Acceleration/Deceleration 720,000 [deg/sec]
Max Acceleration/Deceleration 900,000 [deg/sec]
Jerk is 2,160,000 [deg/sec]
max Jerk is 2,700,000 [deg/sec]
Position error max 10

创建Delta机器人
右键单击组图标,然后选择添加组

选择 Robot
组名称 DELTA
选择 delta xyzr [rrrr]
单击所有四轴,注意框架颜色从红色变为绿色。

综合
此选项卡允许切换链接到组的轴,并更改轴属性,因为您有多于4轴。

耦合
- 对于Delta机器人,不应定义耦合矩阵(定义电机轴是否仅旋转特定关节或多于一个关节。)
- 每个轴的关节位置限制。

属性
此选项卡允许设置机器人属性,如:位置限制,速度限制,加速限制等
注意:
- 确保在simple/Cartesian表“PeMax”(-->delta.pemax=10)中将位置误差设置为最大值10 (-->delta.pemax=10)

配置
该选项表有3个子选项表:
- 确保将工具Z轴设置为15以适应RoboDK(-->delta.tool=#{0,0,15,0})
有关更多信息,请使用以下链接
base
tool
machinetable
workpiece

Delta参数
这里我们设置Delta机器人的机械参数:
Rbig = 110 [mm]
L1 = 100 [mm]
L2 = 270 [mm]
Rsmall = 40 [mm]

建立&配置
现在我们已经准备好生成安装和通信文件,并在softMC上运行它们,点击"Build
&Configure"
 |
---> | 
|
| Build & Configure 前 | Build & Configure 后 |
|---|---|
 |

|

| |

|
关闭配置器
现在退出配置程序,我们可以稍后再回到配置器。

创建解决方案
要创建解决方案,我们必须执行以下操作:
- 打开由Build&Configure创建的Project(apj文件)
- 将其另存为解决方案(asn文件)
- 将Config.prg从控制器添加到PC
- 使用资源管理器将任何用户预览程序复制到文件夹
- 将文件添加到解决方案树
打开工程 (apj file)


另存为解决方案


将Config.prg从控制器添加到PC

将文件添加到解决方案树


添加监视
我们可以从终端查看拥有的轴
-->?grouplist
DELTA:A1,A2,A3,A4
添加启用Delta机器人位置反馈和XYZR值的监视。

运行机器人
现在运行机器人
现在我们可以运行机器人
-->Delta.en=1
-->move delta {0,0,0,20}
重新循环运行机器人
执行以下操作:
- 运行并启动softMCSIM
- 运行ControlStudio并连接到您的softMCSIM
- 打开您的"Delta" 解决方案
- 双击程序文件"StartPRG.PRG"
- 点击图标"Save and Load"
Delta 机器人就绪
用roboDK运行机器人
打开TCP / IP服务器以使用RoboDK
保存加载并运行SERV4DEL.PRG,确保您在ControlStudio消息日志中看到"socket 2 is set"
提示:使用Windows键+左边的错误,在左半边的窗口上得到ControlStudio。
' Version:     1.00
' Author:      Ron Danon DVG
' Description:
' History:     2017-06-17  base on server.prg  V1.00
'              Created
'------------------------------------------------------------------------------
dim shared numOfRobots as long = 1

program continue

  dim index as long
  dim sockNum as long = 2
  dim cPort as long = 7132
  dim jointStr as string
  dim robotGroups[1] as generic group 'same as size of numOfRobots
    dim robotNames[1] as string 'same as size of numOfRobots

'---------------Define robot groups and names---------------'
robotGroups[1] = DELTA
robotNames[1] = "robot1"
'robotGroups[2] = PUMA2
'robotNames[2] = robot2

'---------------Opening new socket---------------'
  call openNewSocket(sockNum,cPort)

'---------------Connecting to client---------------'
  call connectClient(sockNum,cPort,0)

'---------------Main Loop---------------'
  while True
    call createJsonStr(robotNames,robotGroups,jointStr)
    call checkIfReady(sockNum,cPort)
'    ?jointStr
'    ?SIZE(jointStr)
    print #sockNum,jointStr
  end while

'---------------Close sockets and exit---------------'
  print #sockNum,"finish"
  sleep 1000
  close #sockNum
  Print "Server Closed Sockets. Server Exits"

end program ' server.prg


'---------------------------------------'
'---------------Functions---------------'
'---------------------------------------'

sub openNewSocket(sockNum as long,cPort as Long)
  dim opened as long = 0
  while not opened
    Try
      OpenSocket Options=1 as #sockNum
      opened = 1
    catch 5043 'socket is already open
      print "socket", sockNum, "is already open. trying next socket"
      sockNum = sockNum + 1
    end Try
  end while
  print "socket", sockNum, "is set"
end sub


sub connectClient(sockNum as long, cPort as Long, ByVal sockIsOpen as long)
  dim str1 as string
  if sockIsOpen then
    close #sockNum
    OpenSocket Options=1 as #sockNum
  end if
  Accept(#sockNum, cPort)
  sleep 500
  str1=input$(loc(sockNum),#sockNum) 'receive data to check if connected
  ?"client is connected"
  sleep 200
end sub


sub checkIfReady(sockNum as long,cPort as Long)
  'Waits for a 'ready' input from roboDK before sending the next JSON string
  dim ready as long = 0
  while not ready
    Try
      while loc(sockNum) = 0   'while no data is available
        sleep 10
      end while
    catch 5041 'client disconnected
      print "client disconnected, waiting for connection"
      call connectClient(sockNum,cPort,1)
    end Try
    ready = (input$(loc(sockNum),#sockNum) = "ready") 'check if the input is "ready"
  end while
end sub


sub createJsonStr(robotNames[*] as string, robotGroups[*] as generic group, jointStr as string)
'FORMAT --> '{"robotName": [double-a1, double-a2, double-a3, double-a4, double-a5, double-a6]}' <---
'double is in precision of 2 digits after the point, i.e.: '0.12', '179.12'
  dim index1 as long
  dim index2 as long
  dim jointValues as generic joint
  dim temp as long = 50

  jointStr = "{"
  for index1 = 1 to numOfRobots
    jointValues = robotGroups[index1].PFb
    jointStr = jointStr + chr$(34) + robotNames[index1] + chr$(34) + ": ["
    for index2 = 1 to robotGroups[index1].ElementSize
      if index2 = 4 then
        temp = 0
      else
        temp = 50
      end if
      jointStr = jointStr + STRD$(-jointValues{index2} + temp, "%.2f") + ", "
    next
    jointStr = LEFT$(jointStr,LEN(jointStr)-2) + "], "
  next
  jointStr = LEFT$(jointStr,LEN(jointStr)-2) + "}"
end sub

'---------------End of functions---------------'
运行RoboDK
复制粘贴到由Servotronix编写的文件夹“Fanuc_Delta.rdk”包括
- 来自RoboDK库的Delta机器人
- Prog1一个pyton脚本,打开TCP / IP套接字以使用softMCSIM / serv4del.prg
双击Prog1图标打开RoboDK TCP / IP端口,并确保您在ControlStudio消息中看到"client is connected"
| TCP/IP port Close |
TCP/IP port Open |
|---|---|
Prog1
import mcEnv

host, port = "192.168.56.103", 7132
finsihedTransmit = False

MCE = mcEnv.MCenv()
MCE.setSimulationSpeed(1000)
MCE.connectClient(host,port)
MCE.setRobot("robot1", "Fanuc M-1iA/0.5S")

robotList = ["robot1"]

while not finsihedTransmit:
    MCE.writeStr("ready")
    jsonStr = MCE.readJsonStr()
    MCE.moveRobots(robotList, jsonStr)

raise Exception('Finished')
机器人程序示例
这是一个简单的拾取和放置程序,其中P12和P11是较高的位置,P2和P1是较低的位置。
|
'------------------------------------------------------------------------------
' File:        PnPTDelta.prg
' Purpose:     Robot Pick & Place
' Version:     1.00
' Author:      DVG
' History:     15.Jun.2017    -    created
'------------------------------------------------------------------------------

' module global "constants"


' module global variables
dim shared ZeroPosition as joint of xyzr = {0 , 0 , 0 , 0 }                'Moving as joint - for initial positioning
dim shared P1Position as joint of xyzr = {0, 0, 0, 0}                      '{J1,J2,J3,J4}

dim shared P1    as location of xyzr = #{0 , 75 , 300 , 0 }     '{X,Y,Z,R}
dim shared P11   as location of xyzr = #{0 , 75,  225 , 0}
dim shared P22   as location of xyzr = #{0 , -75,  225 , 0}
dim shared P2    as location of xyzr = #{0 , -75,  300 , 0}

dim shared RobotVelocity as double = 40.0
dim shared RobotTranVelocity as double = 40.0

program

    with Delta                                'set default group element, no need to explicitly indicate the motion element
        Attach                               'Attach the task to motion element (with Delta)
            En = TRUE
            Sleep 100
            Vcruise = RobotVelocity          'Set robot's cruise velocity
            Vtran = RobotTranVelocity
            while NOT En
                Sleep 100
            end while
            Move ZeroPosition                'moving to zero position
            WaitForMotion Delta
              call pickPlaceXYZ              'execute Pick and Place function
            Move ZeroPosition
            WaitForMotion Delta
        Detach
    end with

end program


sub pickPlaceXYZ

    dim i as long

    Move Delta P1Position
    WaitForMotion Delta
    Delta.BlendingMethod = 2                  'Type of motion blending - 2 is SuperPosition blending - in order to optimize movement, so that it will be as fast as possible
    Delta.BlendingFactor = 80                 'Percentage of the movement’s length that will not be blended with the next movement
    Delta.Cp = 10                             'At continous path blednign, sets the blend radious value - bigger equal smoother
    for i = 1 to 10
        Moves Delta P11
        WaitForMotion Delta
        Moves Delta P1
        WaitForMotion Delta
        Moves Delta P11
        WaitForMotion Delta
        Moves Delta P22
        WaitForMotion Delta
        Moves Delta P2
        WaitForMotion Delta
        Moves Delta P22
        WaitForMotion Delta
    next i
    Move Delta ZeroPosition
    WaitForMotion Delta

end sub