Difference between revisions of "Control Studio"
(→IP Configurator: temp) |
(→getting Strated: temp) |
||
| Line 23: | Line 23: | ||
====getting Strated==== | ====getting Strated==== | ||
| − | '''Step 1''' - Connect your | + | '''Step 1''' - Connect your softMC to the power supply,the network - with the Ethernet cable, and to the computer - from COM1 (as shown), with the serial cable. <br> |
| + | ::[[image: IP_9.png|300px]] | ||
| + | run '''ControlStudio''' and turn on your softMC. | ||
| − | '''Step 2''' - In the ControlStudio, go to '''controller Monitor''' menu at the right side of the screen. There you will see the devices which connect to your network, without any information about your new unknown | + | '''Step 2''' - In the ControlStudio, go to '''controller Monitor''' menu at the right side of the screen. There you will see the devices which connect to your network, without any information about your new unknown softMC or with a device that doesn't have IP address: <br> |
::[[image: IP_1.png|900px]] <br> | ::[[image: IP_1.png|900px]] <br> | ||
| Line 41: | Line 43: | ||
| − | '''Step 4''' - | + | '''Step 4''' - In the ControlStudio, at the menu bar - choose '''Tools''' <big><big>→</big></big> '''IP Configurator'''. <br> |
::[[image: IP_2.png|900px]] <br> | ::[[image: IP_2.png|900px]] <br> | ||
'''Step 5''' - New window will open.<br> | '''Step 5''' - New window will open.<br> | ||
| − | ::[[image: IP_6.png| | + | ::[[image: IP_6.png|250px]] <br> |
| − | + | * In case you already '''know''' the device IP address - choose ''Yes'' button. A '''Connect Via Network''' window will pop-up - fill the blank spaces with the correct information and press the ''Connect'' button. <br> | |
| − | :::[[image: IP_7.png| | + | :::[[image: IP_7.png|250px]] <br> |
| − | + | ||
| + | * In case you '''don't know''' the device IP address - choose ''No'' button. A '''Connect Via COM''' window will pop-up. In this window you will be asked about the connection between the softMC and your PC - the COM1 port. If you don't sure how to locate it - press ''Where is my COM port?'' link or go back to '''Step 1''' for the picture. If the softMC connected properly choose the ''Connect'' button. <br> | ||
| + | :::[[image: IP_8.png|250px]] <br> | ||
| + | |||
| + | |||
| + | '''Step 6''' - New window will open - '''Select COM Device'''. In this window you'll have to choose the serial port in your PC that attached to the softMC<br> | ||
| + | ::[[image: IP_10.png|250px]] <br> | ||
| + | After the right port as been selected - press the ''Connect'' button. <br> | ||
| + | |||
| + | |||
| + | '''step 7''' - The '''Set IP''' window will open. <br> | ||
| + | ::[[image: IP_11.png|250px]] <br> | ||
| + | |||
| + | |||
| + | * In case you '''know''' that your softMC has modified and has an IP address - you can choose '''Obtain an IP address automatically''' to use the former address, and press the '''Apply''' button. The details of the IP address will show up when you press the '''Show Config''' button. <br> | ||
| + | ::[[image: IP_12.png|250px]] <br> | ||
| + | Now you can find and connect the softMC with the same IP address in the '''controller Monitor''' on the right, and close the '''IP Configurator'''. <br> | ||
| + | ::[[image: IP_13.png|900px]] <br> | ||
| + | |||
| + | * In case you '''don't know''' | ||
===SSH Terminal=== | ===SSH Terminal=== | ||
Revision as of 11:28, 18 July 2017
| Language: | [[::Control Studio|English]] • [[::Control Studio/zh-hans|中文(简体)]] |
|---|
Contents
ControlStudio
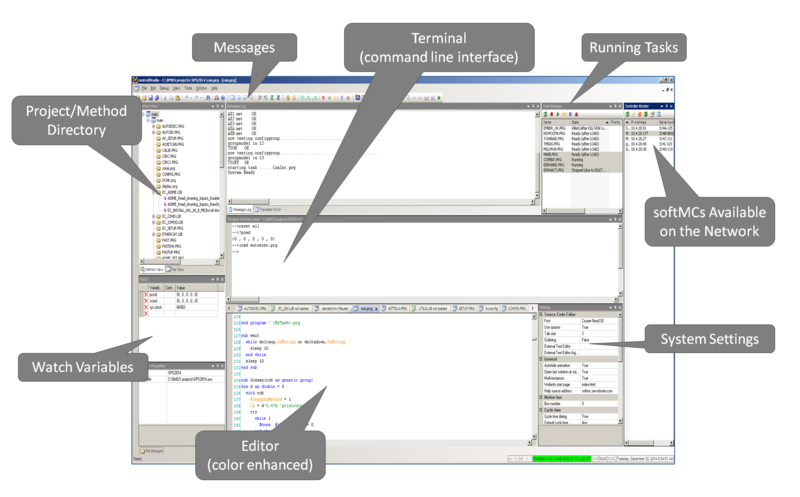
ControlStudio software is a development tool for motion applications. It contains a programming editor, data recorder, debugger and monitoring tools.
- ControlStudio is the integrated development environment (IDE) for the softMC.
- Used to write programs (tasks), debug tasks, record data.
- Graphical user interface.
- Provides a command line interface (terminal) to the softMC
tools
IP Configurator
Description
The IP Configurator tool will help you to define your new or unknown MC IP address, before you get to connect with.
To use the configurator you'll need the following:
- computer that runs ControlStudio.
- MC-3 or MC-7.
- Ethernet cable to connect between your network and the MC device.
- Serial Cable to connect between the MC devise and the computer.
- DC power supply - for the MC.
getting Strated
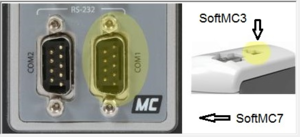
Step 1 - Connect your softMC to the power supply,the network - with the Ethernet cable, and to the computer - from COM1 (as shown), with the serial cable.
run ControlStudio and turn on your softMC.
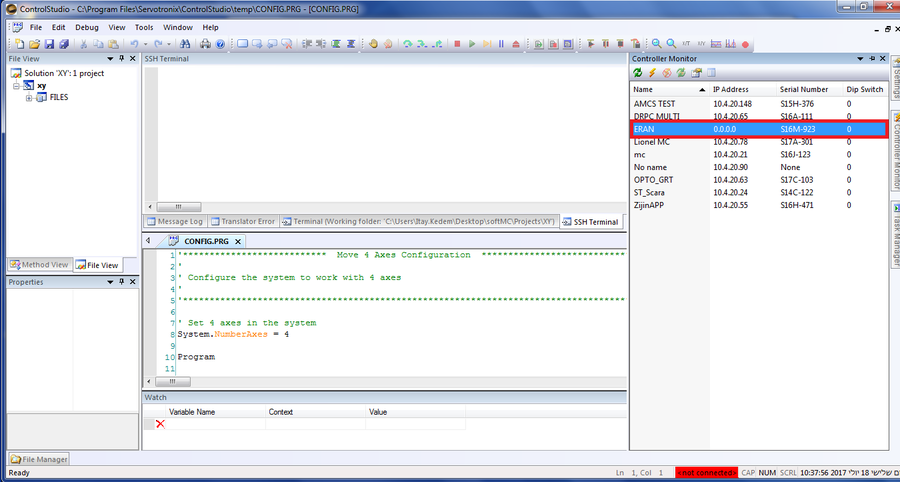
Step 2 - In the ControlStudio, go to controller Monitor menu at the right side of the screen. There you will see the devices which connect to your network, without any information about your new unknown softMC or with a device that doesn't have IP address:
Step 3 - According to your network properties - choose an IP address or get one from your network manager.
You can check the address availability by using windows command tool (CMD), with ping command as shown here in yellow:
Additional information about your address will be found in the same window, using the ipconfig command:
The information that required to us is the Subnet Mask and the default Geteway:
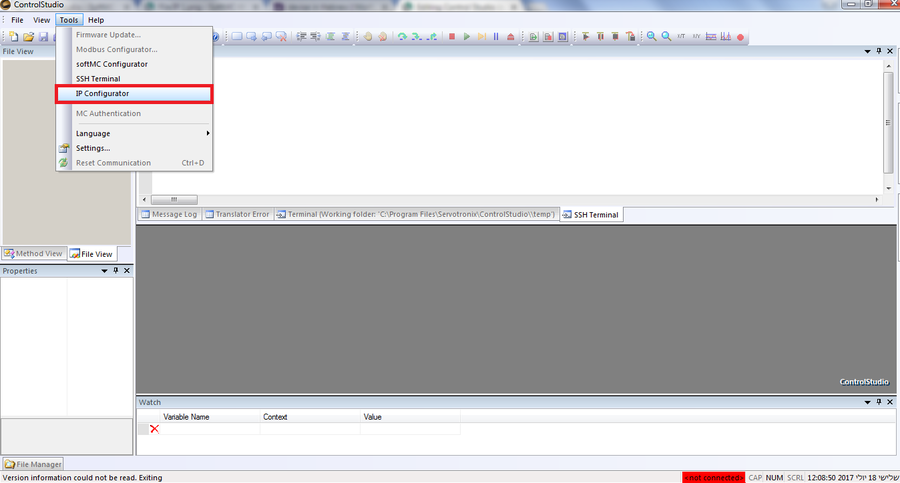
Step 4 - In the ControlStudio, at the menu bar - choose Tools → IP Configurator.
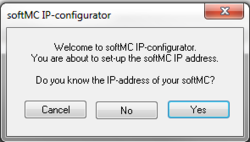
Step 5 - New window will open.
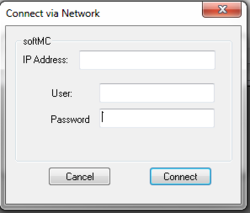
- In case you already know the device IP address - choose Yes button. A Connect Via Network window will pop-up - fill the blank spaces with the correct information and press the Connect button.
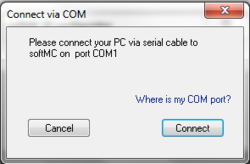
- In case you don't know the device IP address - choose No button. A Connect Via COM window will pop-up. In this window you will be asked about the connection between the softMC and your PC - the COM1 port. If you don't sure how to locate it - press Where is my COM port? link or go back to Step 1 for the picture. If the softMC connected properly choose the Connect button.
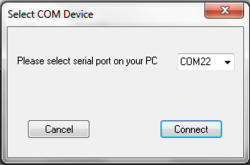
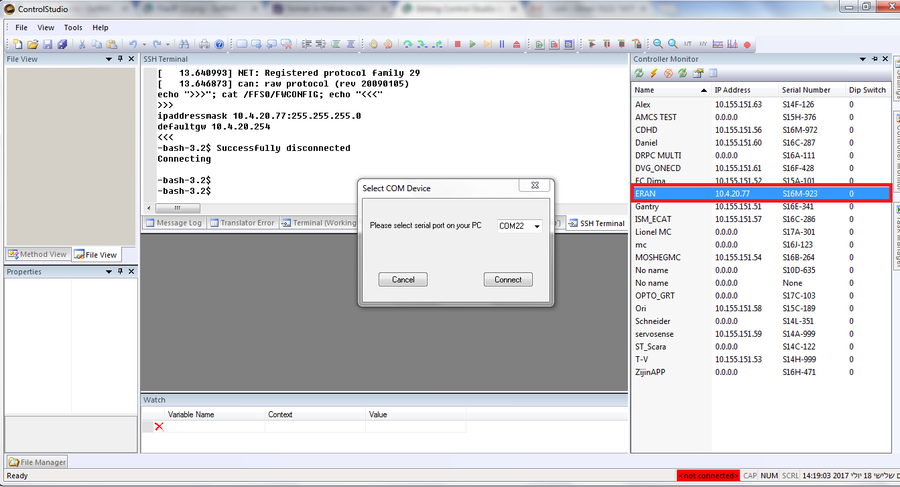
Step 6 - New window will open - Select COM Device. In this window you'll have to choose the serial port in your PC that attached to the softMC
After the right port as been selected - press the Connect button.
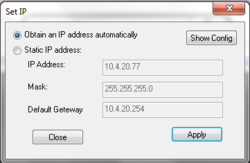
step 7 - The Set IP window will open.
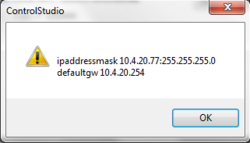
- In case you know that your softMC has modified and has an IP address - you can choose Obtain an IP address automatically to use the former address, and press the Apply button. The details of the IP address will show up when you press the Show Config button.
Now you can find and connect the softMC with the same IP address in the controller Monitor on the right, and close the IP Configurator.
- In case you don't know
SSH Terminal
Description
Getting Started
| NOTE | |
| This manual is under the assumption that the ControlStudio already connected to a robot or a simulator. |
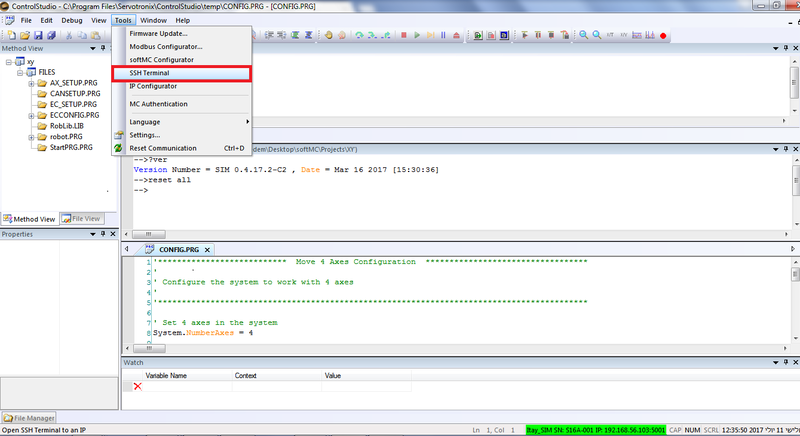
step 1 - At the menu bar, under the Tools tab - choose the SSH Terminal button.
step 2 - A new window will be opened. In this window you need to confirm the folowing:
- IP address that belong to your robot/simulator.
- Your username and password to access your robot/simulator.
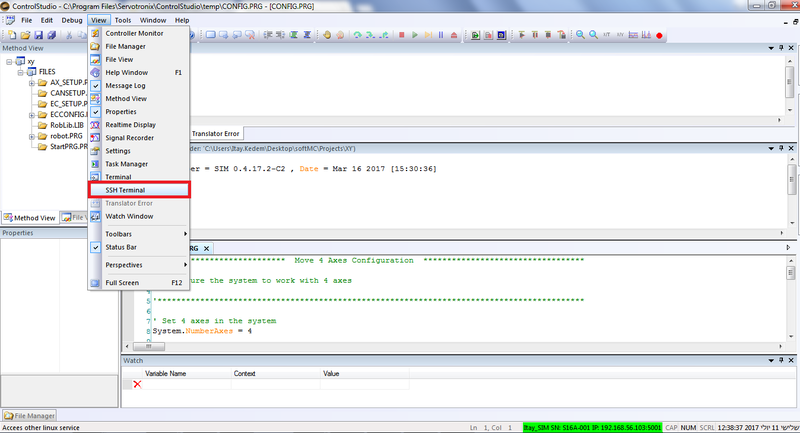
step 3 - Back to the menu bar, under the view tab - choose the SSH Terminal button.
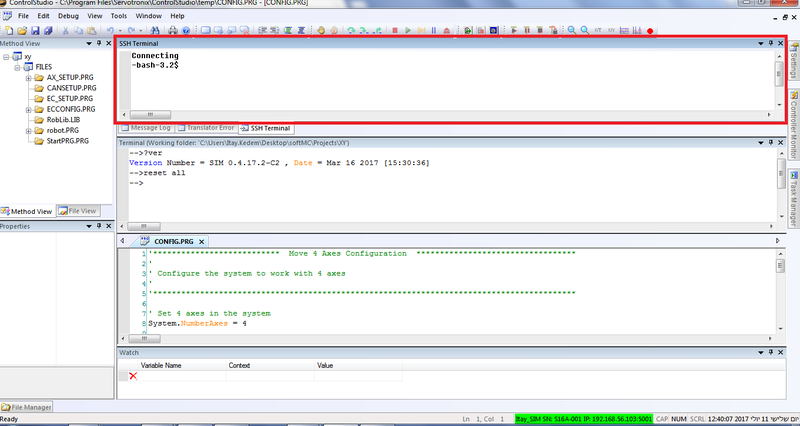
step 4 - The SSH Terminal interface will be opend, ready for yout commands.
Example
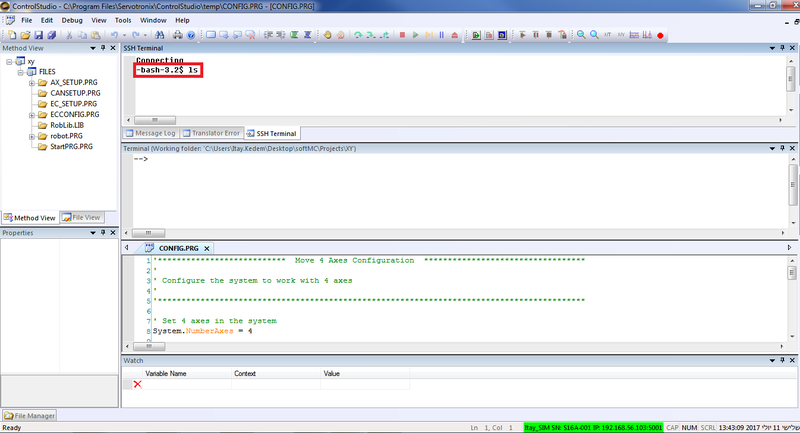
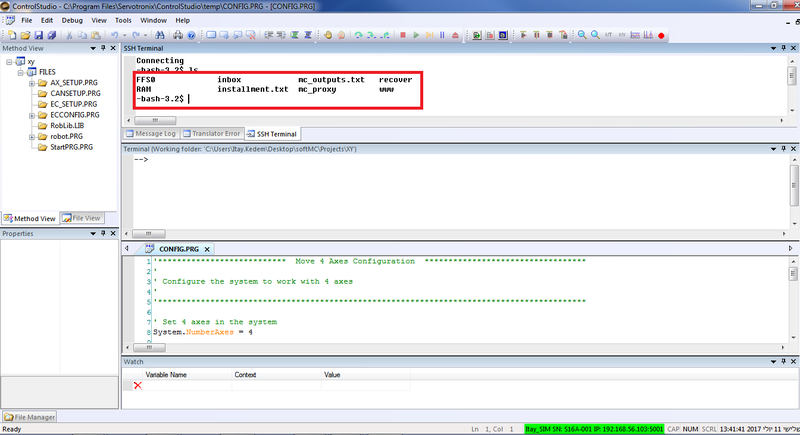
In this example we use the ls command - that provide list of files in the current working directory.
| NOTE | |
| The SSH Terminal operated by Linux commands. |
Step 1 - In the SSH terminal window add the command you want to activated, and press the enter button.
Step 2 - In the same window, you will get the information you asked for.
