Project Examples Manual/zh-hans
| 语言: | [[::Project Examples Manual|English]] • [[::Project Examples Manual/zh-hans|中文(简体)]] |
|---|
以下的示例创建演示了机器人的简单配置和机器人执行的运动。
每个例子包含了"ZIP"文件,它包含了你运行项目所需的所有文件。您将在项目示例页面中找到文件列表。
注意 有真实系统的例子,以及模拟系统的例子。
您可以复制和修改每个项目示例 - 您将在下面找到说明。
| NOTE | |
| 在 "ZIP"文件夹中,您将找到一个包含机器人/电机制造商提供的基本参数的excel文件。 这些参数在使用softMC Configurator中配置机器人使用 |
| NOTE | |
| 在一些模拟的例子中,有一个通过 RoboDK软件 运行虚拟机器人的选项,你会发现下面的说明。 |
Contents
如何将项目示例加载到ControlStudio
- 将项目ZIP文件下载到您的计算机中,解压并保存到可访问的文件夹中。
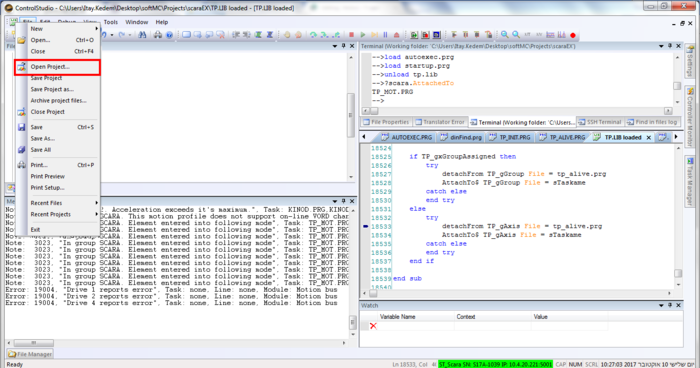
- 打开ControlStudio,在菜单栏中选择File → Open Project...并找到项目示例文件。 注意相关的文件是 ".apj"文件.
- 要将项目文件上传到控制器,请执行以下操作:
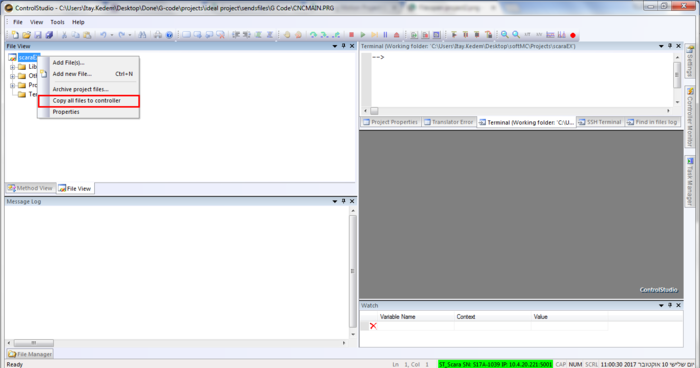
- 在"File View"窗口的项目树上, 右键单击项目名称并选择 "Copy all files to controller"
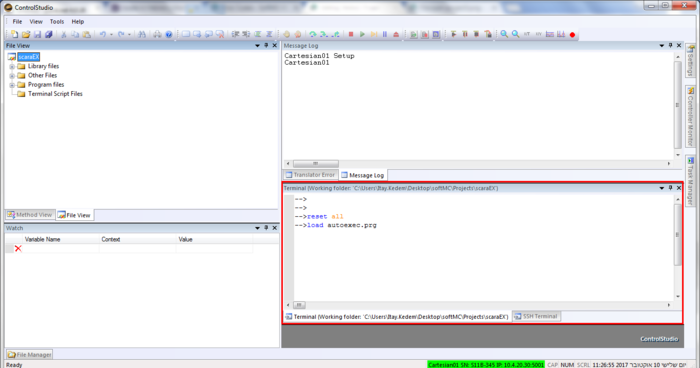
- 在terminal → 发送 Reset All命令, 在发送 Load AUTOEXEC.PRG任务后执行.
- 在"File View"窗口的项目树上, 右键单击项目名称并选择 "Copy all files to controller"
- 该项目现在准备根据示例文件运行特定的运动示例程序 - 在每个示例页面中给出的说明。


How To Open Project Example Properties With softMC Configurator
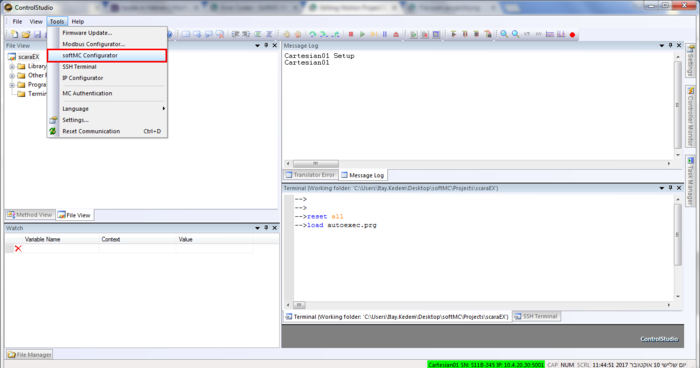
- After load and run the example to ControlStudio, open softMC Configurator from the menu-bar Tools → softMC Configurator.
- The project setups will open at softMC Configurator window, notice that you use the same system as describe in the example page.
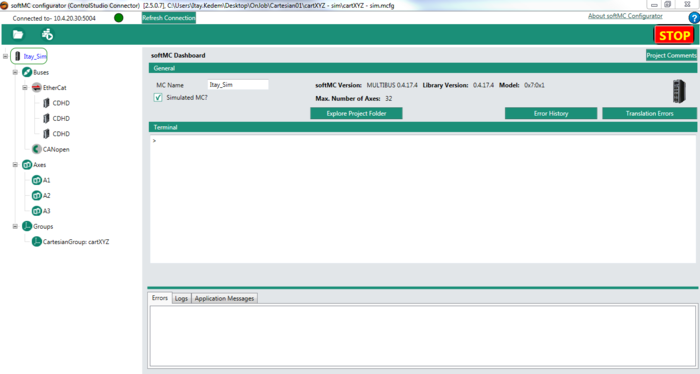
- You can watch and change properties for axes and robot as you want. It's recommended to make project duplicate, as explain bellow, and make changes to the copy.
- You can find more information about softMC Configurator HERE


How To simulated Robots Using RoboDK
To simulate relevant examples on RoboDk, you will need the following:
- RoboDK software. You can download it from HERE
- mcEnv.py file - Download and extract the file from HERE. Save this file at your roboDK folder.
- Robot template, that provide with the project.
- Working ControlStudio that connect to your softMC.
Follow those steps to connect your softMC with the simulated robot using ControlStudio:
- After loading project files as explain before, load SERVER.PRG program from ControlStudio terminal :
--> load SERVER.PRG
- When the program finished, you will get the following message at the Message Log ("socket 2" it's an example)
socket 2 is set
- With RoboDK open the robot file, RoboDK Station file or .rdk file.
- At the left side, right click on Prog1, the python file, and choose Edit Python Script. A new window will opened.
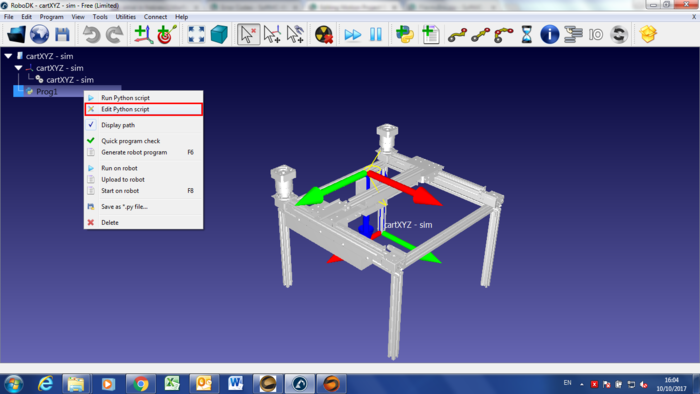
- In the Python script you'll need to make sure that the host IP address, is the one that your softMC has. If it's not the same - change and save it, and close the window:

- Execute double click on the Python script symbol, a small yellow arrow should appear on the symbol. You will get the following message at the Message Log
client is connected
- From now until you disconnect from RoboDK file, from your network or other interruptions, you can watch every movement command you will execute in ControlStudio.


Project Example Duplication
In case you want to use the projects examples setups, or want to create your own setups, you can copy the examples properties, including programs files, library and more, by following the next steps:
- From ControlStudio, at the menu-bar, choose File → Save Project as...
- Locate project copy at any folder you'll like.
- You have now a new robot, with all necessary files, ready for you to take control.